Why Patagonia Will Wreck Your Travel Expectations (In the Best Way)
Patagonia doesn’t care about your Instagram aesthetic. The wind will destroy your carefully styled hair. The weather will change four times before lunch. And you’ll love every single unpredictable minute of it.
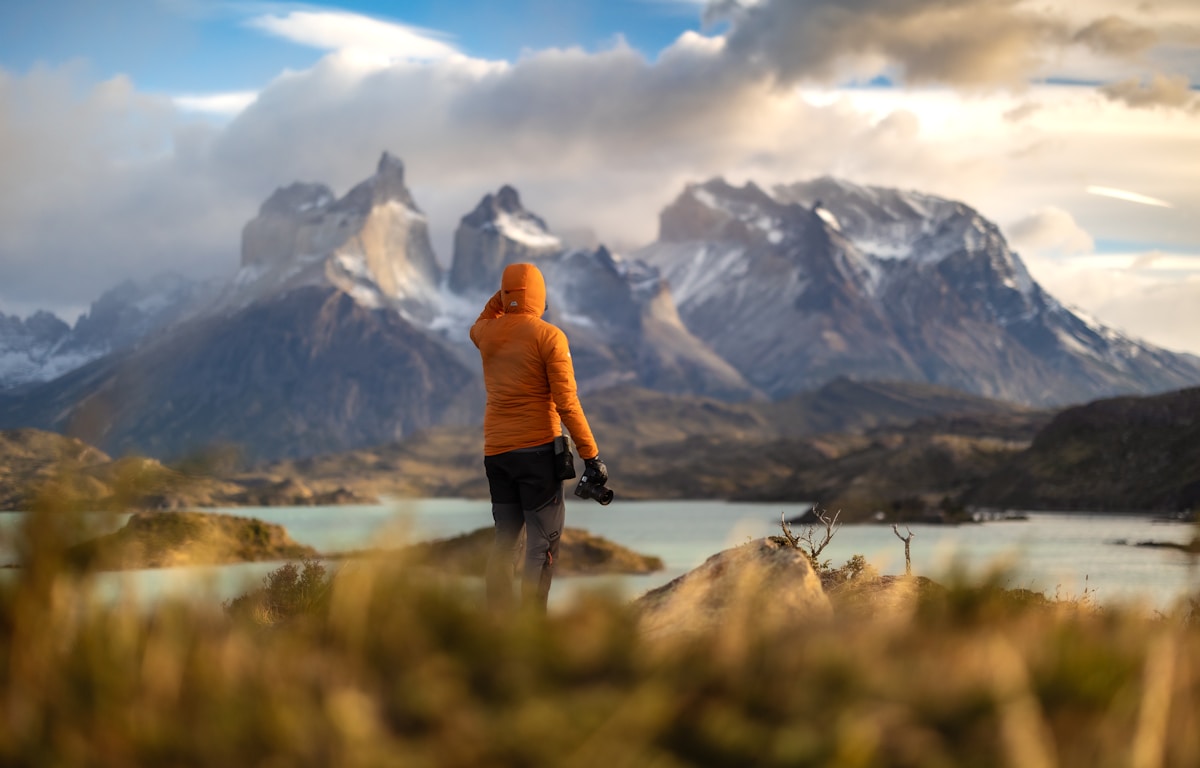
This region straddling southern Chile and Argentina is one of those rare places that actually lives up to the hype. Massive glaciers calving into turquoise lakes. Granite spires that look photoshopped but aren’t. Guanacos just casually hanging out like they own the place (they do).
But here’s the thing — Patagonia punishes poor planning. I’ve seen travelers show up in December without accommodation bookings, wearing cotton everything, wondering why they’re miserable. Don’t be that person.
When to Go: Picking Your Window

The Prime Season (November to March)
Summer in the Southern Hemisphere runs opposite to the north, so Patagonia’s peak season is November through March. This is when you get the longest days, the warmest temperatures, and the best chance of actually seeing those famous peaks without cloud cover.
December through February is the sweet spot. Temperatures in Torres del Paine hover between 5°C and 15°C (40-60°F). Sounds cold, but when the sun’s out and the wind dies down, you’ll be hiking in a t-shirt.
The catch? Everyone else knows this too. The W Trek gets absolutely packed in January. Refugios book out months ahead. Prices spike.
Shoulder Season Magic (October and April)
October brings spring wildflowers and fewer crowds, but trails can still be muddy or partially closed. April offers autumn colors — those lenga trees turning gold against granite is something else — but daylight hours shrink fast.
If you’re flexible and don’t mind gambling on weather, shoulder seasons reward you with solitude. I did the W Trek in late March once. Had entire viewpoints to myself. Also got snowed on. Worth it.
What About Winter?
June through August is technically possible but honestly not recommended for first-timers. Many facilities close, trails become dangerous, and daylight is limited to maybe 8 hours. Unless you’re specifically after winter mountaineering or cross-country skiing, skip it.
Step-by-Step Planning Process
Step 1: Decide Chile Side, Argentina Side, or Both
This decision shapes everything else. Most people pick one.
Chilean Patagonia means Torres del Paine National Park — the poster child of the region. The W Trek and O Circuit live here. Puerto Natales is your gateway town.
Argentine Patagonia means El Chaltén (trekking paradise with Fitz Roy), El Calafate (Perito Moreno Glacier), and Ushuaia if you want to tack on “the end of the world.”
Doing both requires either flying between countries or taking long bus rides. The border crossing at Cerro Castillo is straightforward but adds a full travel day.
My recommendation for first-timers with 10-14 days: pick one country, do it properly. You can always come back.
Step 2: Book Accommodations Early (I Mean It)
For Torres del Paine, refugios and campsites on the W Trek sell out 3-6 months ahead for peak season. This isn’t a “maybe book ahead” situation — it’s mandatory reservation through CONAF or the private refugio companies (Vertice and Fantastico Sur).
El Chaltén is slightly more forgiving since most hikes are day trips from town. But December-January still sees hostels filling up weeks in advance.
Puerto Natales and El Calafate have more inventory, but quality budget spots disappear fast. Book at least a month out.
Step 3: Figure Out Your Transportation
Getting to Patagonia takes effort. From Santiago, you’re looking at a 3+ hour flight to Punta Arenas, then a 3-hour bus to Puerto Natales. From Buenos Aires, it’s about 3 hours to El Calafate.
No direct buses connect the major hubs efficiently. The distances are vast — don’t underestimate this. El Calafate to Puerto Natales by bus takes 5-6 hours including border crossing.
Rent a car if you want flexibility outside the main trekking circuits. Roads in the region are mostly good, though some stretches turn to gravel. If you’re planning a broader Southeast Asia or South America backpacking journey, Patagonia requires more advance logistical planning than most destinations.
Step 4: Plan Your Itinerary Day by Day
Here’s a realistic 10-day Chile-focused itinerary:
- Days 1-2: Fly into Punta Arenas, bus to Puerto Natales, acclimatize
- Days 3-7: W Trek (5 days/4 nights, west to east direction recommended)
- Day 8: Rest day in Puerto Natales, eat lamb, recover
- Day 9: Day trip to Milodon Cave or kayaking
- Day 10: Bus to Punta Arenas, fly out
Rushing Patagonia defeats the purpose. Weather delays happen. You need buffer days.
What to Pack: The Non-Negotiable List

Clothing (Layers Are Everything)
Patagonia weather changes fast. Like, you’ll experience four seasons in an afternoon. The layering system isn’t optional.
Base layer: Merino wool or synthetic, not cotton. Cotton kills in wet conditions — it holds moisture and chills you fast.
Mid layer: Fleece or lightweight down jacket. I bring both because I run cold.
Outer layer: Waterproof, windproof shell jacket is absolutely essential. The wind in Torres del Paine can literally knock you sideways. A cheap poncho won’t cut it. Budget at least $150 for a decent Gore-Tex or similar jacket if you dont already own one.
Pants: Zip-off hiking pants work great. Bring waterproof over-pants for rainy days. Jeans stay home.
Accessories: Warm beanie, buff/neck gaiter, liner gloves plus warmer gloves, quality sunglasses. The UV at this latitude is intense.
Footwear
Broken-in waterproof hiking boots. Not trail runners, not new boots you’re testing — proper boots you’ve already walked 50+ kilometers in. Blisters can ruin a trip.
Bring camp shoes for refugios. Sandals or lightweight sneakers work.
Gear Essentials
- Backpack: 40-50L for multi-day treks, 25-30L for day hikes from El Chaltén
- Sleeping bag: Refugios provide bedding, but if camping, bring a bag rated to -5°C minimum
- Trekking poles: Your knees will thank you, especially on descents
- Headlamp: Essential even in summer — you’ll start pre-dawn for sunrise viewpoints
- Water treatment: Streams are generally safe in the parks, but a Steripen or filter gives peace of mind
- Sunscreen and lip balm with SPF: The wind and sun will destroy your face otherwise
What People Forget
Earplugs. Refugio dorms have snorers. Every single one.
Cash in Chilean pesos AND Argentine pesos if crossing borders. ATMs exist but are unreliable.
Passport copies in a separate bag. Borders require documentation.
Dry bags for electronics. Even if your pack has a rain cover, moisture finds a way.
Budget Reality Check
Patagonia isn’t cheap. Get that expectation right now.
Torres del Paine park entry alone is around $40 USD for foreigners. Refugio beds run $80-150 per night including meals. A realistic budget for 10 days — flights from Santiago, accommodation, food, transport, park fees — lands between $2,500-3,500 USD for a mid-range trip.
You can cut costs by camping (bringing your own gear), cooking your own food, and staying in Puerto Natales hostels between trekking days. But this isn’t a budget Europe trip where you can wing it on $50 a day.
Common Mistakes to Avoid
Underestimating distances and wind: That “easy” 12km hike becomes brutal when headwinds hit 80km/h.
Not having backup plans: If weather closes the passes, what’s your plan B? Always have alternative day hikes or rest day activities.
Over-packing your trekking bag: Every gram matters after 20km. Be ruthless.
Skipping travel insurance: Medical evacuation from remote Patagonia costs thousands. Get proper adventure travel coverage.
Final Thoughts
Patagonia demands respect and rewards preparation. But don’t let the logistics intimidate you out of going. Thousands of regular people — not elite mountaineers — hike these trails every season.
The planning is front-loaded. Once you’re there, boots on the trail, wind in your face, watching condors soar over granite towers… the spreadsheets and booking confirmations won’t matter anymore.
Just don’t pack cotton. Seriously.